Vim on Windows!
Howdy! So, I’m not that good at vim, but I enjoy learning and trying it out!
Today, I’m going to go over setting up some tools for getting Vim installed as well as do a little self-promotion of my own install script for installing my vimrc and installing the plugins I use. You don’t actually have to use my vimrc, the big thing for me when setting up vim was when installing plugins, the initial set up was a bit manual.
Installing Stuff
So! How do we get started. First, I’d follow the steps to install chocolatey
which is a package manager for Windows. If you’ve used a package manager on Mac or Linux, it’s similar,
but not as convenient sadly. The reason it’s not as convenient is that not all packages get added to
the environment PATH variable.
After you have chocolatey installed, here’s the list of packages I install for getting my setup:
- ag - Silver Searcher, an ack/grep like tool but faster
- cmake - cross-platform build process tool
- git - version control system
- golang - Go Programming Language
- jdk8 - Java Programming Language
- llvm - Compiler Infrastructure including Clang
- nodejs
- python2 - Python Programming Language
- rust-ms - Rust Programming Language for use with Microsoft Build Tools
- vim - Text Editor
Also, you’ll have to install a version of Visual Studio.
npm Installs
For getting autocomplete in typescript you’ll have to globally install the typescript language:
npm i -g typescript
Updating the Path
By default, a few of the things we’ve installed using Chocolatey won’t be added to our path. We’ll have to
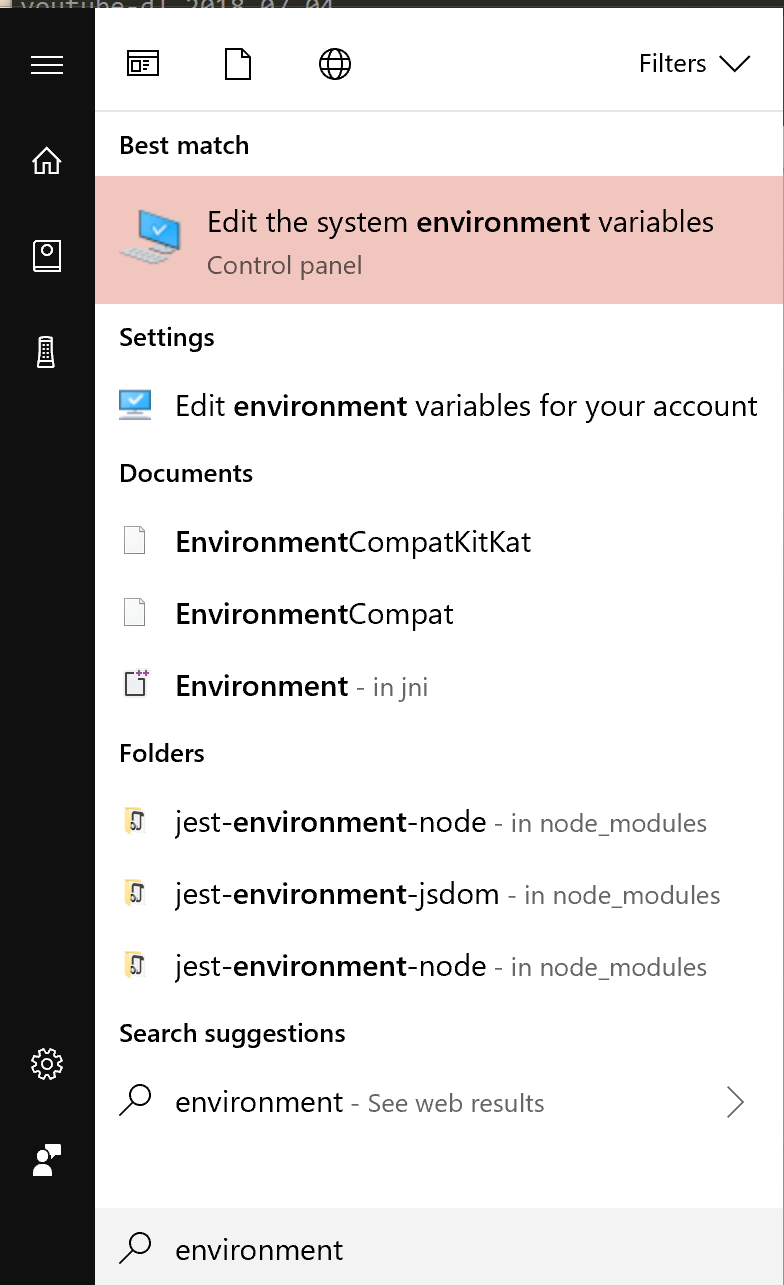
manually add them for things to work correctly. By searching for ‘environment’ in start we can edit our
path variable:
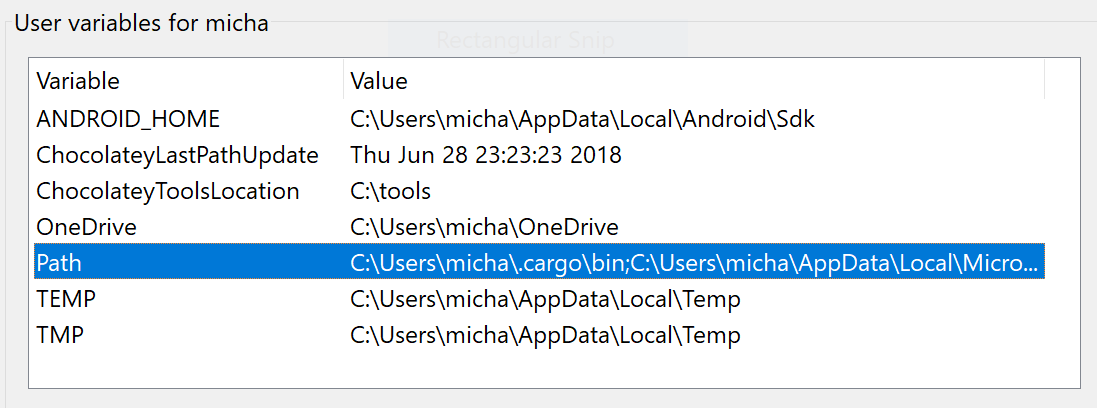
Double click on Path:
You should have an environment similar to mine:
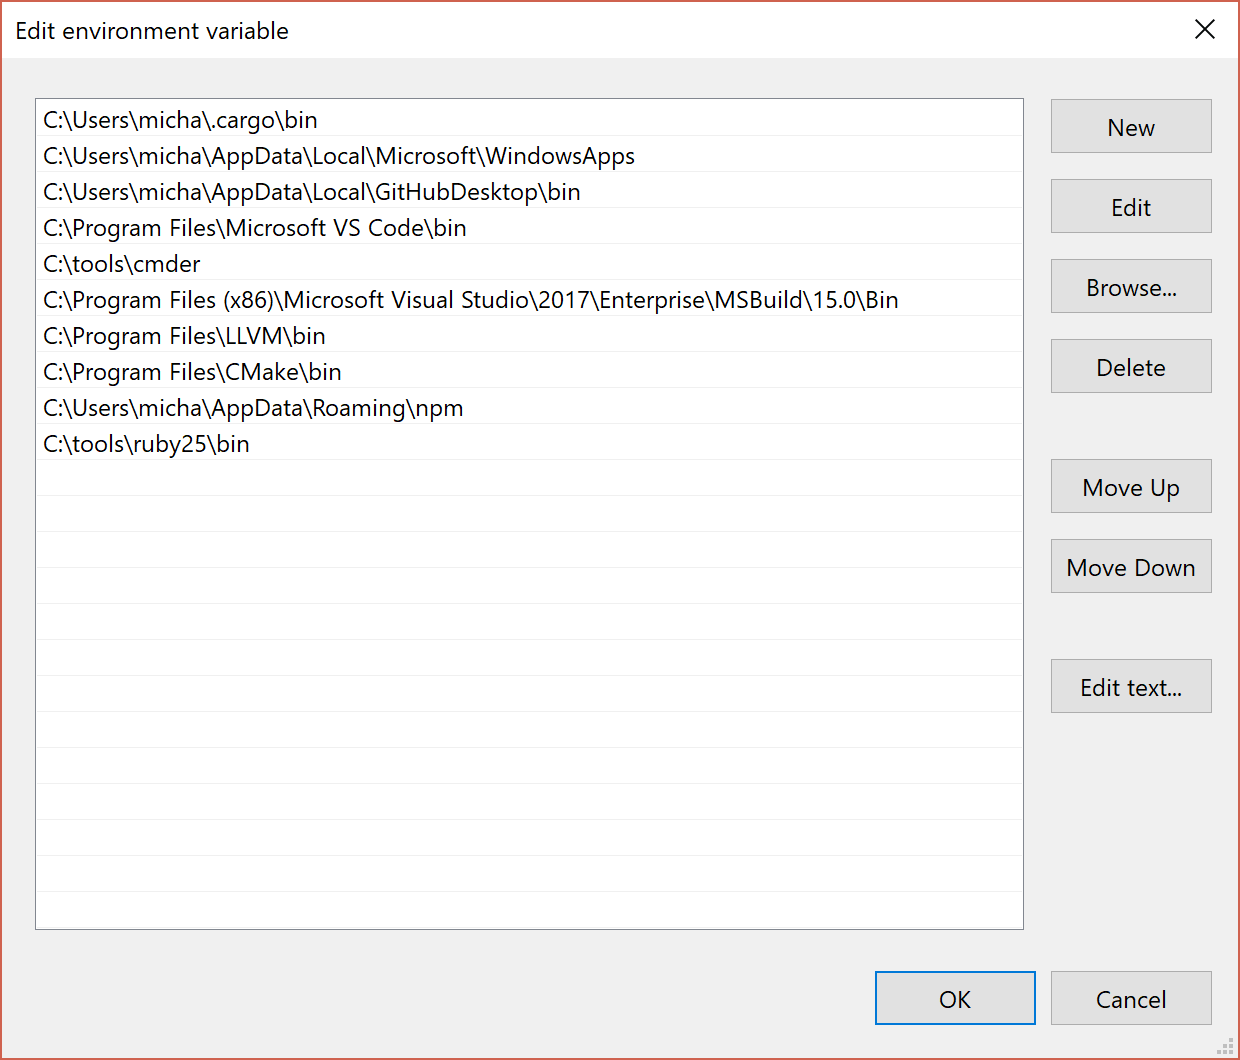
Where it has “micha” you’ll want to put your home folder instead.
For the Visual Studio path, you’ll want to have your version of Visual Studio (Mine is “Enterprise”).
You might not have ruby or cmder installed, but can use Chocolatey to install them if you want. So you might not need those in your path.
Once that’s all configured, you should close and reopen any PowerShell Windows you have open (or command prompt).
Installing the vimrc
So, you should be able to install the vimrc using my repository:
git clone https://github.com/scaryrawr/vimrc
cd vimrc
./install.ps1 -Fonts -BuildYouCompleteMe
-Fonts and -BuildYouCompleteMe only need to be ran the first time you run the script since you probably
won’t have the powerline fonts already installed or have built
You Complete Me.
What is the script actually doing?
The latest version can always be found here.
First we copy over the vimrc to the correct location, as well as ignore files for ag.
Copy-Item -Path vimrc -Destination "$HOME/.vimrc"
Copy-Item -Path ignore -Destination "$HOME/.agignore"
Copy-Item -Path ignore -Destination "\$HOME/.ignore"
Then we go through the vimrc and install or update plugins, as you can see, it assumes that the plugins we be Plugin ‘github/repo’, (maybe I should update it to support other plugin providers…)
\$regex = "^\s\*Plugin\s+'(.+)'"

Get-Content -Path "$HOME/.vimrc" | Where-Object { $_ -match \$regex } | ForEach-Object {
\$repo = (\$_ | Select-String -Pattern $regex).Matches[0].Groups[1].ToString()
    $dirname = $repo.Split('/')[1]
    $destination = "$HOME/.vim/bundle/$dirname"

    # Pull updates if there or install if not there
    if (Test-Path -Path $destination) {
        Set-Location -Path $destination
        git pull
    } else {
        git clone https://github.com/$repo $destination
    }

}
We also check if YouCompleteMe was installed and we’re flagged to build it.
$ycmDir = "$HOME/.vim/bundle/YouCompleteMe"
if ($BuildYouCompleteMe -And (Test-Path -Path $ycmDir)) {
Set-Location -Path \$ycmDir

    # Error message on linux
    git submodule update --init --recursive

    python ./install.py --all

}
If we’re flagged to install fonts we’ll also install those:
if (\$Fonts) {
git clone https://github.com/powerline/fonts.git --depth=1
Set-Location -Path ./fonts
./install.ps1
Set-Location -Path ..
Remove-Item -Recurse -Force fonts
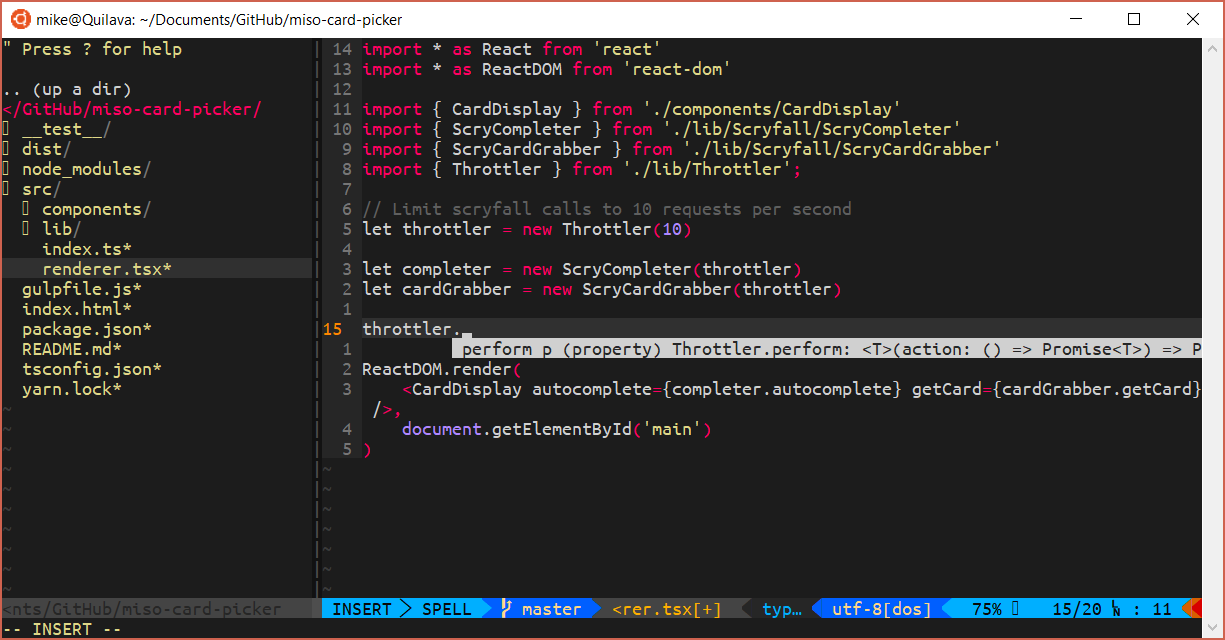
}Finished Setup
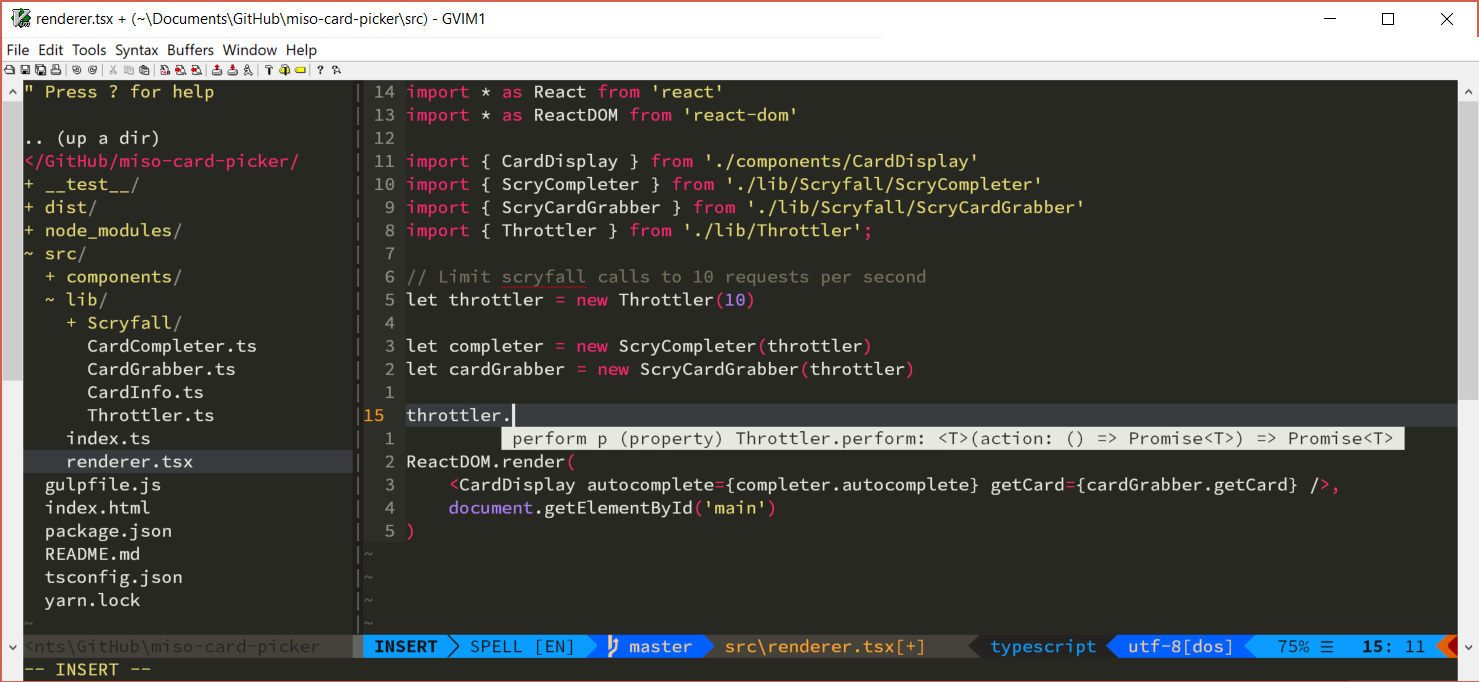
So here you can see the status bar at the bottom which is vim-airline the arrows don’t display correctly unless you’re using a Powerline font.
You can also see a suggested completion from You Complete Me.
Also, on the left is Nerdtree.
Running on Linux
So the PowerShell script will also run on Linux if you install it, but you’ll have to make sure to install all the dependencies there as well using your package manager of choice.
Thanks for reading!